Board & Batten Nursery Wall
My friend got pregnant with her first baby towards the end of 2021 and she asked me if I’d help her turn one of her spare bedrooms into the perfect nursery for her little one. Of course I couldn’t say no! She sent me ideas of what she was thinking and then I sent her more inspiration pics to try to get an idea of what she wanted. We settled on a classic board and batten grid style accent wall. We measured the wall and then used a board and batten wall calculator (like this one: https://www.calconic.com/calculator-widgets/board-batten-wall-calculator/60e9e0816db6df002a0369d9) to figure out the spacing and how many boards we should buy. After that, we went to buy our supplies. She decided on a beautiful navy blue color (Naval by Sherwin Williams) and then we used 1x4s for the actual design. Here is what we started with:
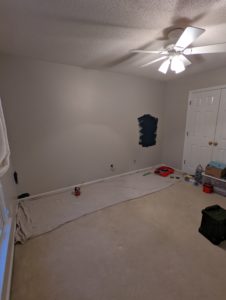
I forgot to take a true before pic before we started painting, but you get the idea. The wall was just a blank tan wall when we started. I did the cutting in and my friend did the rolling. She had never painted before so she wanted me to tackle the more tedious task of cutting in. She did a great job though!
Once the wall was all painted (we did two coats to make sure it had as smooth of a finish as possible) we got to work sanding and priming the boards. Everything took a little longer than it maybe normally would because we’re good friends who don’t see each other a ton so there was a lot of chatting involved. ?
The next step was to install the border of the accent wall. She decided to keep the baseboards in place so we just placed the bottom board directly on top of the baseboard. We installed the boards using brad nails and tugged on them after install to make sure they weren’t going anywhere since this is a baby’s room. We didn’t want to use liquid nails or anything like that to secure the boards in case she decides to remove them at some point down the road since liquid nails can cause some pretty significant drywall damage. You can also shoot the nails in at an angle to each other so they kind of lock together behind the drywall in an x pattern to make it sturdier.
Once the border was up, the hardest part was next. We used the measurements we found from the calculator tool and figured out where to place the vertical boards on the wall. I don’t remember exactly why now, but for some reason the measurements weren’t perfect so there was a decent amount of eyeballing and trying to figure out exactly where the boards looked the best. We ultimately decided that any differences in the distance between the boards would be negligible to the naked eye so we went with it.
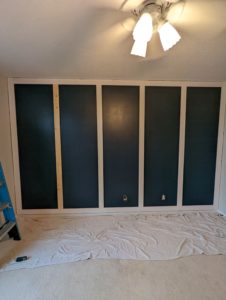
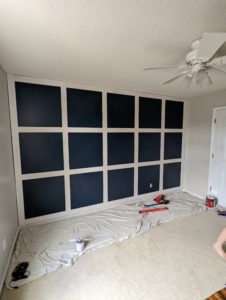
We actually somehow miscalculated and bought one less vertical board than we needed so we had to buy one more after we had primed which is why one is still raw wood in the picture. My friend primed the last board while I got to work cutting and installing the horizontal pieces. We used a laser level for this part and it was really helpful. Also just having an extra set of eyes was helpful too to confirm that everything was lining up how it should.
Once all the boards were up, it was time for the finishing work. My friend wood filled all the nail holes and the seams where the boards butted up to each other while I caulked inside all of the squares. These steps are so tedious, but they’re worth it if you want a professional looking finish!
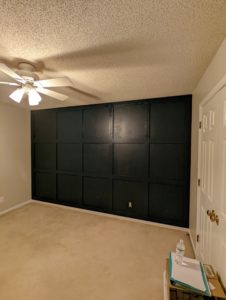
After the finishing work was done, we sanded the wood filler flush and then got to work painting the boards to match the rest of the wall. This is where it really came together and I think my friend saw the vision come to life. That’s my favorite part of DIY projects – taking something that’s in my head (or someone else’s!) and making it a reality. It’s the coolest feeling.
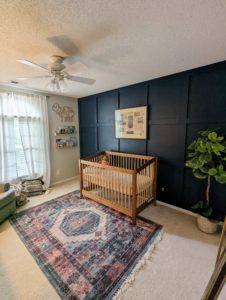
And here’s the finished product right after we were done and then several months later once she got all of her décor in place. Isn’t it just the most perfect baby boy nursery? I love it so much and I’m so thankful I was able to do this for her! She learned a lot in the process and I got to make her vision a reality. Such a fun, rewarding weekend! Do you have somewhere you could put a wall like this in your home? It’s really not that difficult and took us about 2.5 days to complete! Definitely worth it!