Limewashed Brick Wall
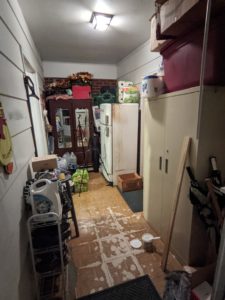
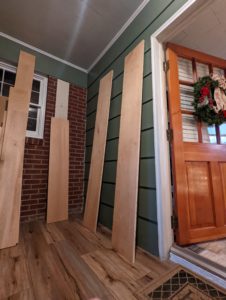
To wrap up my parents’ porch renovation, my mom wanted to limewash the brick wall that the wardrobe we built butts up to. She felt like limewashing the wall would add some warmth to the space and make it look cozier and more inviting. I definitely think we accomplished that, but you’ll have to let me know what you think! Here’s the before of the wall before we did anything and then after we painted and installed new flooring.
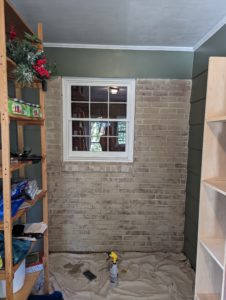
The process of limewashing is actually pretty simple, especially if you use a quality product. The product we used was Romabio Classico Limewash in the color Riposo Beige. The container instructs you on the steps to take for the best finish and also on how to properly thin it to get the best application. To begin, we cleaned the wall really well by vacuuming with a horsehair brush and then wiping it down with some warm white vinegar to get off any grime. After we cleaned it, we allowed the brick to dry for about 45 minutes to an hour. Then we got to work limewashing. We actually completed this project in the middle of the wardrobe build I mentioned earlier because we knew the wardrobe was going to touch the wall. If we had done this process after, there would be parts of the brick that weren’t limewashed and if someone decides to remove the wardrobe in the future, it would obviously look weird and who knows if they’d be able to find a limewash to match. Below is a video of the cleaning process as well as the process of applying the limewash.
Prior to applying the limewash, the container also recommends that you wet the brick a bit with a spray bottle to get the best application. To get the distressed look, you can choose to spray the limewash a few minutes after application with water and smudge with a cloth to remove as much or as little as you want. We started doing it that way, but then decided we could get the same look by just not applying quite as much of the limewash. I think it turns out nice either way. Really just personal preference.
That’s honestly all there is to it. It’s somewhat intimidating at first because you’re obviously permanently altering the appearance of the brick, but the actual application process wasn’t very difficult and I’ve found it to be really forgiving. We also painted the window on that wall because it was an ugly dull blue color before and I think that helped give the wall a more fresh appearance too. The whole process took us a few hours and can easily be done in an afternoon. Of course if you were tackling a larger project, like the exterior of your home, it would take longer and you would need to consider air temperature and possible rain to ensure the limewash goes on as smoothly as possible. Here is the finished product!
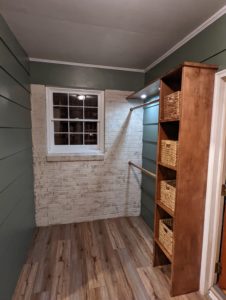
I think it turned out really nice and gave my mom the look she was going for. Please let me know if you have any questions and I’d love to hear your thoughts! I know painting brick can be a bit controversial, but that’s the great thing about home projects – you can choose to do whatever makes you happy in your own home!