Basic Laundry Folding Table
When my mom and I decided to renovate her back porch literally from top to bottom, we wanted to make it as functional as possible. We added a bench with storage when you come in the back door, a massive shelving unit to store canned goods and other miscellaneous home items, a wardrobe type area to store work clothes for her and my dad (post coming soon!), and lastly, a laundry folding table next to the washer and dryer to make that mundane task a little easier.
My mom browsed Pinterest and found examples of what she liked, but ultimately, like most things, we came up with the design on our own. She wanted the table to be movable rather than built in like the rest of the builds so that she would have no issue getting the washer or dryer out later if needed. Additionally, she wanted there to be a top area for folding, but also a couple of shelves underneath to place clothes after folding to get them out of the way. With that basic idea, we got to work.
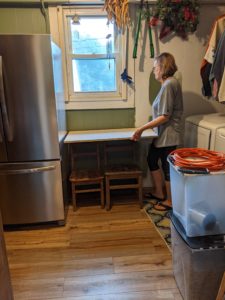
We weren’t quite sure how tall to make the table so we just grabbed a leftover piece of plywood from one of the other builds and held it up on the wall where we thought it should go. Then I took a photo so my mom could see the height and determine if she thought it was a good fit or not. Sure, we could have measured and placed a piece of tape on the wall or something like that, but we’re both super visual people and it helped to have an actual piece of wood.
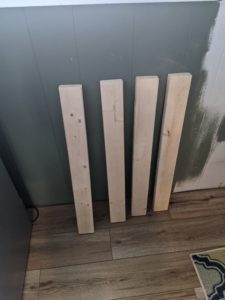
Once we decided that around 3 feet tall would be good, I cut the legs to size out of 2x4s. I had to account for the 3/4″ maple plywood that would go on top as well as the height of the casters that we wanted to put on the bottom to make the table easily movable.
After the legs were cut, we figured out how big we wanted the top and shelves to be and cut them to size as well.
From here, the assembly process was relatively easy. First, I figured out where on the underneath side of the table top I wanted the legs to go and marked that out for later. Then we decided to attach the shelves to the legs first. If I remember correctly, I think we chose to do it this way to ensure that the shelves would have a snug fit to the legs. We didn’t want to attach the top first, risk having the spacing of where the legs should go be off, and then end up with gaps where the shelves should butt up to the legs. I drilled pocket holes into the underneath side of the shelves so that we would have a way to secure the shelves while the wood glue dried. This was somewhat challenging though because we had to lay the table on its side and use a square to try to ensure everything was level and good to go. A bit more frustrating that anticipated, but we got it done.
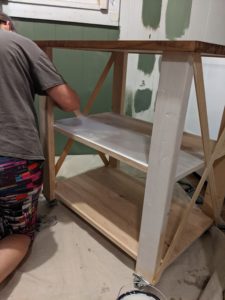
Once the shelves were attached, we spent entirely too long trying to figure out the best way to center the table top. We ended up flipping the table every which way possible and finally deciding to just turn it right side up and eyeball what looked the best. We’re not professionals by any means and we know that so we just wanted to make sure it looked good to the naked eye.
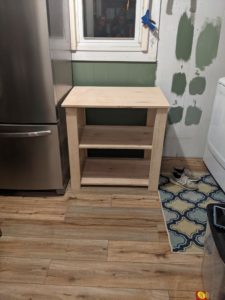
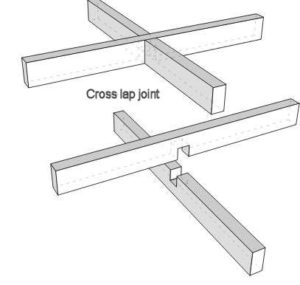
Here is where we are at this point. My mom also told me that she wanted there to be “Xs” on either side of the table to help keep things on the shelves from falling onto the floor and also just as a fun added detail. I’m a little extra so I decided to try my hand at a cross lap joint to make the X. To do this, I decided to use my router and cut half way through the piece of wood we were using on both parts of the x so that they would fit into each other. Here’s an example of what I’m talking about from Google because I don’t think I have a great picture of what I actually did.
This was a joint I had never done before, but I think it turned out pretty well! My mom was happy so that’s all I really cared about. I did wood fill the seams where the two boards met and sanded down so that you hopefully couldn’t tell after we painted.
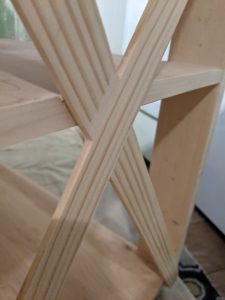
I attached the Xs using wood glue and brad nails to secure. At this point, the actual building part was pretty much complete. All that was left was making it pretty!
Like we had with previous builds, I added a thicker trim board around the top of the table to beef it up a bit and make it look more finished. For the shelves though, we decided to just add maple edge banding because the trim boards were too thick and we felt like they would have overpowered the Xs and even the legs. In the video above, I’ve already added the trim pieces and am wood filling the seams to make it smooth. I really wanted to ensure this table top was extra smooth since I knew my mom would be putting clothes and linens on it to fold so I didn’t want the wood to snag any of her fabric.
After everything was wood filled and sanded smooth, we moved on to staining and painting. My mom decided she wanted the top to be stained the same color as the other 2 builds (Minwax Early American) and she wanted the bottom part to be painted the same white as the top part of the bench build (Sherwin Williams White Dove). I graciously let my mom do this part because I know how much she loves staining and painting. ? She did prime the wood prior to painting as well which is really important when you’re working with raw wood (keeps the wood from soaking up all your paint since there’s a barrier in place by the primer so you use less in the end).
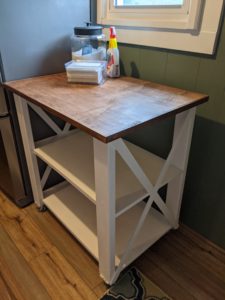
The last thing we did was add 4 casters to the bottom so she can move it around easily and even use it in other areas of her home if she wants to!
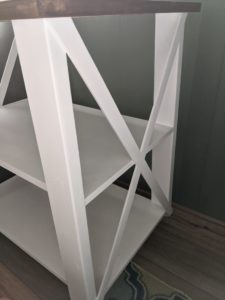
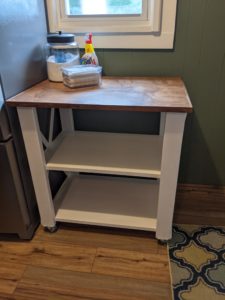
And that’s it! Way less complex of a build than the other parts of this porch, but still really practical and helpful for my mom! I think she likes having a designated area to fold clothes now and a place to tuck them out of the way if she doesn’t want to put them in their respective drawers right away. What do you think of this build? Is it something you could use or that you think would be practical in your home too? I’d love to know what you think. Be sure to follow along on Instagram (@joynerathome) for other builds that I do and so you can share with me if you decide to build one too!