DIY Wood Accent Wall
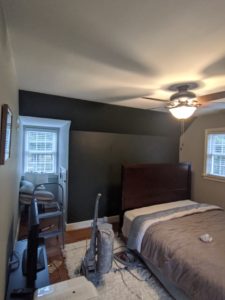
Our upstairs guest bedroom has hands down been my least favorite room in our house since we moved in 4 years ago. It was a light blue color that just felt cold, the floors were in rough shape, and I never really liked the décor.

It kind of felt like a catch all room with mismatched furnishings that didn’t feel welcoming. I wasn’t embarrassed for guests to stay there, but I wasn’t proud of it either. Over the last year or so, I finally decided that I wanted to redo it, but I wasn’t sure exactly how. I started scouring the internet and found photos of dark green wood accent walls that made my heart skip a beat. I knew that’s what I wanted to do. This August I finally decided to tackle it!
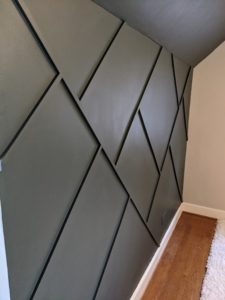
I started by picking a dark green color to paint as the base. I went with Green Labyrinth by Sherwin Williams and it is honestly perfect. It added the perfect amount of warmth while also creating a focal point. For the wood accent, I bought ½” by ¾ by 8’ pine boards that I primed with Zinsser Bulls Eye 123 Primer once I got them home. After they were dry, I honestly just started putting pieces up on the wall with my nail gun. I had an idea in my head of what I wanted it to look like, but didn’t actually plan/draw anything out. The boards were 8 feet long so I started out by placing one in the top left corner of the wall and then positioning it so that it laid flush with the baseboard. It’s really important to get this first board square and level so that the other boards coming off of it will be square too.
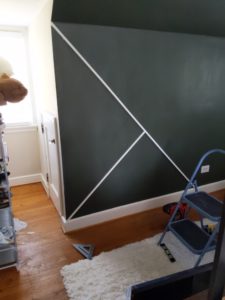
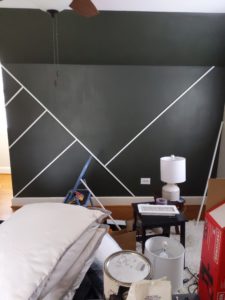
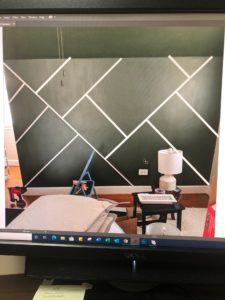
After I got the first board up on the wall, I started cutting smaller pieces to come off of it towards the bottom left corner of the wall. I honestly just continued like this to come up with the design. I would hold a piece up and try to visualize if I liked the way it looked there. If I did, then I’d make the cut and if not, I’d try something else. My brother is also a graphic designer so once I got to a certain point and had no clue what to do next, I sent him a picture of what I had and asked him to help me finish the design. As usual, he delivered!
To make the cuts, I used my Kobalt dual bevel miter saw that I actually bought specifically for this project. I’m really glad I purchased this one though because I’ve already used it for several other projects since completing the accent wall. It’s easy to use and I like that it can cut both directions and can cut a wide variety of angles. Definitely makes projects way easier! Anyway, this wall actually ended up being a lot easier than I was expecting. I made all of my cuts 45° so that the boards would lay flush with the top of the wall or the baseboard. I also didn’t really use a tape measure at all because a) I hate measuring and b) it was easier to just place the board where I wanted and then mark where I needed to cut. I would usually cut the board a little too long so that I could trim off more if I needed to. You can always take off more, but you can’t add any back! I think that’s a good life rule in general. ![]()

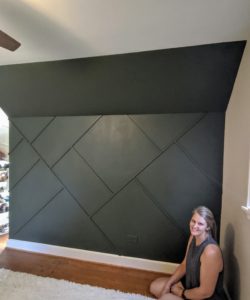
Once I got the design on the wall, I filled in all the nail holes and joints where the boards came together with wood filler and then caulked where the boards met the wall. This gave a more finished, professional look that helps make a DIY project look less like a DIY. Once the wood filler was dry, I sanded smooth and then wiped everything down to eliminate any saw dust or other dust that found it’s way to the wall while I was working. Then, I painted the wood boards the same green color to match. While I did like the look of the white boards, my vision was for the entire wall to be green so I went with my gut. Ultimately, I didn’t want the wall to be an obnoxious focal point but more like a subtle way of adding dimension. Overall, I’ve very happy with how it turned out and super proud of myself for bringing my vision to life. Tell me in the comments if you think you could tackle something similar or show me your work by tagging me on Instagram @joynerathome!
[Products are linked above, but feel free to reach out if you have additional questions!]